SCORE survival guide: Difference between revisions
| (45 intermediate revisions by 2 users not shown) | |||
| Line 1: | Line 1: | ||
This page is a detailed step-by-step tutorial for inputing music in the SCORE editor (MS-DOS version). This guide is useful for the first-time user to learn how to do basic navigation in the SCORE editor. This tutorial is useful for practice entering the exercises on the [[SCORE user input]] page. | |||
== Inputting Music == | == Inputting Music == | ||
<table> | |||
<tr><td> | |||
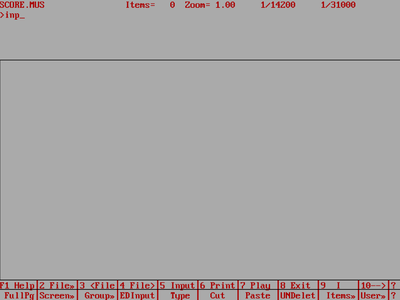
Type the <b>INP</b> (or INPUT) command at the SCORE command prompt to start input mode in Score: | |||
</td><td> | |||
[[File:score-input-start.png|400px|thumb|center|Type "INP" to start input mode.]] | [[File:score-input-start.png|400px|thumb|center|Type "INP" to start input mode.]] | ||
</td></tr> | |||
<tr><td> | |||
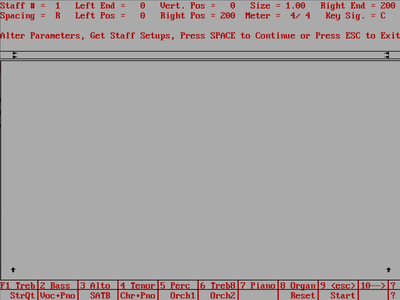
This will take you to the Input menu which are lists of parameters at the top of the screen. Use the Arrow keys to move between the parameters. Type numbers to change them. The meter and mode are not really useful to set. Mostly the size of the music, and the starting and stoping point for the staves are useful settings. An important one is the spacing parameter (but only when dealing with more that one voice/layer on a staff). Here is what the screen should look like after pressing "INP{{keypress|enter}}": | This will take you to the Input menu which are lists of parameters at the top of the screen. Use the Arrow keys to move between the parameters. Type numbers to change them. The meter and mode are not really useful to set. Mostly the size of the music, and the starting and stoping point for the staves are useful settings. An important one is the spacing parameter (but only when dealing with more that one voice/layer on a staff). Here is what the screen should look like after pressing "INP{{keypress|enter}}": | ||
</td><td> | |||
[[File:score-input-menu.png|400px|thumb|center|After typing "INP" to start input mode.]] | [[File:score-input-menu.png|400px|thumb|center|After typing "INP" to start input mode.]] | ||
</td></tr> | |||
<tr><td> | |||
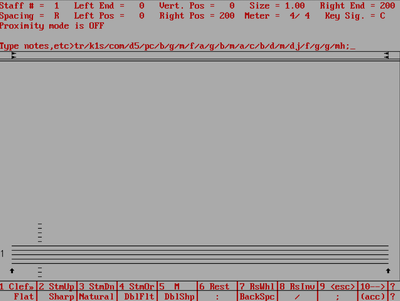
After the settings in the input menu are as desired, press the space bar to start typing the five-stage user input. | After the settings in the input menu are as desired, press the space bar to start typing the five-stage user input. | ||
Here is a demonstration of the 5 stages for one of the basic melodic examples. First typing the pitch stage: | Here is a demonstration of the 5 stages for one of the basic melodic examples. First typing the pitch stage: | ||
</td><td> | |||
[[File:score-input-pitch.png|400px|thumb|center|Typing pitch stage in input mode.]] | [[File:score-input-pitch.png|400px|thumb|center|Typing pitch stage in input mode.]] | ||
</td></tr> | |||
<tr><td> | |||
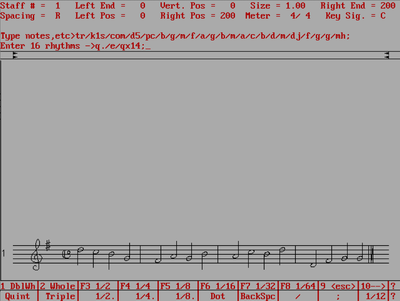
Then after pressing {{keypress|enter}}, you will see pitches on the staff (in the Windows version the notes appear on the staff as you type them). Then you can type the rhythm stage: | Then after pressing {{keypress|enter}}, you will see pitches on the staff (in the Windows version the notes appear on the staff as you type them). Then you can type the rhythm stage: | ||
</td><td> | |||
[[File:score-input-rhythm.png|400px|thumb|center|Typing rhythm stage in input mode.]] | [[File:score-input-rhythm.png|400px|thumb|center|Typing rhythm stage in input mode.]] | ||
</td></tr> | |||
<tr><td> | |||
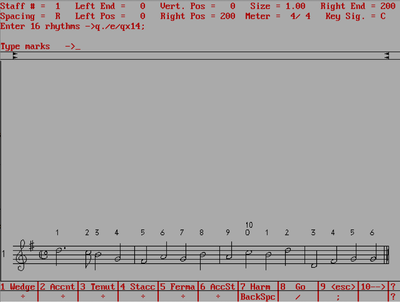
Note the information at the bottom of the screen. You can click on those boxes to insert rhythms, or press {{keypress|F4}} to insert a quarter note for example. Notice that after you press {{keypress|enter}} after the rhythm stage, the notes area assigned rhythmic values, and there are little (temporary) numbers shown above each note: | Note the information at the bottom of the screen. You can click on those boxes to insert rhythms, or press {{keypress|F4}} to insert a quarter note for example. Notice that after you press {{keypress|enter}} after the rhythm stage, the notes area assigned rhythmic values, and there are little (temporary) numbers shown above each note: | ||
</td><td> | |||
[[File:score-input-marks.png|400px|thumb|center|Typing marks stage in input mode.]] | [[File:score-input-marks.png|400px|thumb|center|Typing marks stage in input mode.]] | ||
</td></tr> | |||
<tr><td> | |||
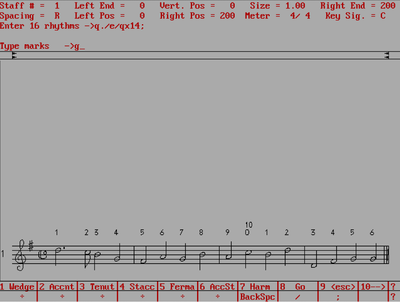
In this case there are no marks, beams or slurs to add to the music. You can type {{keypress|:|enter}} three times, or type {{keypress|g|enter}} to finish inputing the music: | In this case there are no marks, beams or slurs to add to the music. You can type {{keypress|:|enter}} three times, or type {{keypress|g|enter}} to finish inputing the music: | ||
</td><td> | |||
[[File:score-input-end.png|400px|thumb|center|Terminating input sequence early.]] | [[File:score-input-end.png|400px|thumb|center|Terminating input sequence early.]] | ||
</td></tr> | |||
<tr><td> | |||
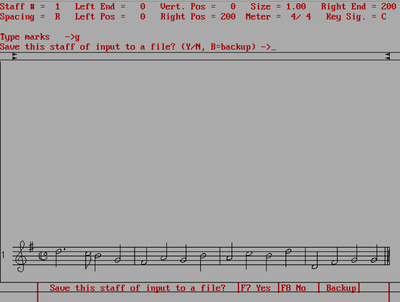
At this point SCORE asks if you want to save the data. It is asking if you want to save the text you just typed (ultimately not the graphical notation data that SCORE will generate from this text). You should type "Y" as a beginner and then view the data in a text editor to see what it looks like. This data can also be read into SCORE again with the RE command (helpful if you mess up the notation and don't want to enter by hand again): | At this point SCORE asks if you want to save the data. It is asking if you want to save the text you just typed (ultimately not the graphical notation data that SCORE will generate from this text). You should type "Y" as a beginner and then view the data in a text editor to see what it looks like. This data can also be read into SCORE again with the RE command (helpful if you mess up the notation and don't want to enter by hand again): | ||
</td><td> | |||
[[File:score-input-save.png|400px|thumb|center|Input mode data save.]] | [[File:score-input-save.png|400px|thumb|center|Input mode data save.]] | ||
</td></tr> | |||
<tr><td> | |||
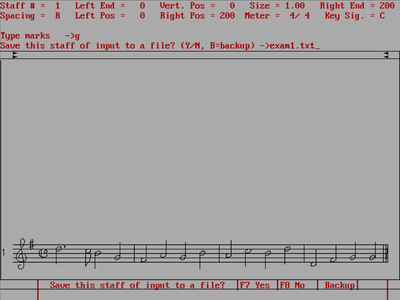
The data is text, so it is best to add the extension .txt to the filename. Also note that the filename base can only have 8 characters (this is MS-DOS): | The data is text, so it is best to add the extension .txt to the filename. Also note that the filename base can only have 8 characters (this is MS-DOS): | ||
</td><td> | |||
[[File:score-input-filename.png|400px|thumb|center|Input mode data save.]] | [[File:score-input-filename.png|400px|thumb|center|Input mode data save.]] | ||
</td></tr> | |||
<tr><td> | |||
SCORE then starts to enter staff two (note that staff one is the bottom staff on the page). Press {{keypress|esc}} to exit input mode and return to command mode. | SCORE then starts to enter staff two (note that staff one is the bottom staff on the page). Press {{keypress|esc}} to exit input mode and return to command mode. | ||
</td><td> | |||
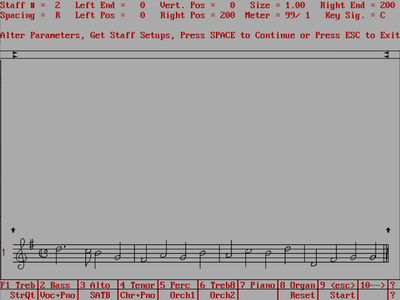
[[File:score-input-staff2.png|400px|thumb|center|Staff 2 input menu]] | |||
</td></tr> | |||
</table> | |||
== Saving Music == | == Saving Music == | ||
<table> | |||
<tr><td> | |||
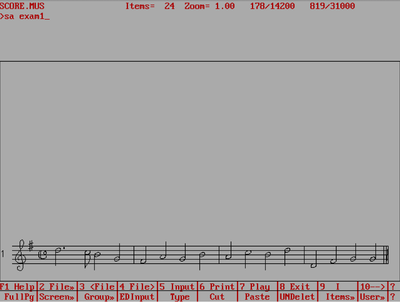
It is wise at this point to save the music (in its graphical form). Type "sa exam1 {{keypress|enter}}" to save the current page to the hard disk. This will create the file "exam1.mus" | It is wise at this point to save the music (in its graphical form). Type "sa exam1 {{keypress|enter}}" to save the current page to the hard disk. This will create the file "exam1.mus" | ||
</td><td> | |||
[[File:score-input-savebinary.png|400px|thumb|center|Save contents to disk]] | [[File:score-input-savebinary.png|400px|thumb|center|Save contents to disk]] | ||
</td></tr> | |||
Notice that after you save the file, there is a message in the top | <tr><td> | ||
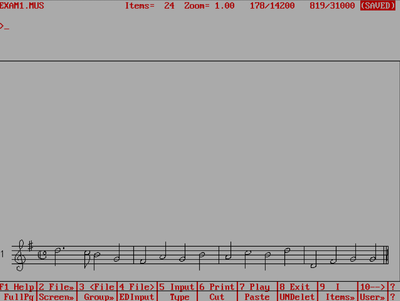
Notice that after you save the file, there is a message in the top right corner saying that the file is saved, and the top left corner lists the name of the file: | |||
</td><td> | |||
[[File:score-input-savestatus.png|400px|thumb|center|Save status at top of window]] | |||
</td></tr> | |||
</table> | |||
== Clearing Music == | |||
= | <table width=100%> | ||
<tr><td> | |||
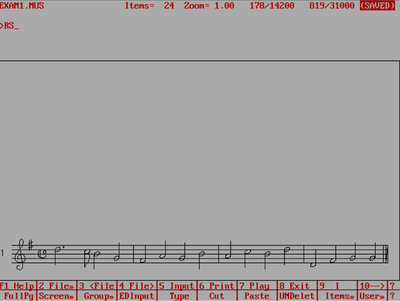
Try typing "RS {{keypress|enter}}" to clear the contents of the editor: | Try typing "RS {{keypress|enter}}" to clear the contents of the editor: | ||
</td><td> | |||
[[File:score-input-rs.png|400px|thumb|center|Clear contents of editor with RS command]] | [[File:score-input-rs.png|400px|thumb|center|Clear contents of editor with RS command]] | ||
</td></tr> | |||
<tr><td> | |||
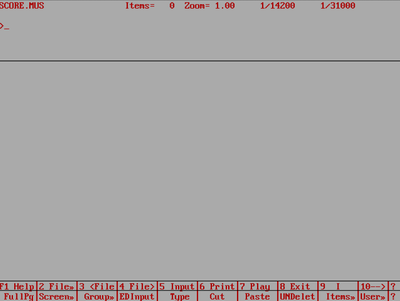
This will put the editor in the initial state: | This will put the editor in the initial state: | ||
</td><td> | |||
[[File:score-input-staringstate.png|400px|thumb|center|Cleared contents of editor after RS command]] | [[File:score-input-staringstate.png|400px|thumb|center|Cleared contents of editor after RS command]] | ||
</td></tr> | |||
</table> | |||
== Load Music == | == Load Music == | ||
<table> | |||
<tr><td> | |||
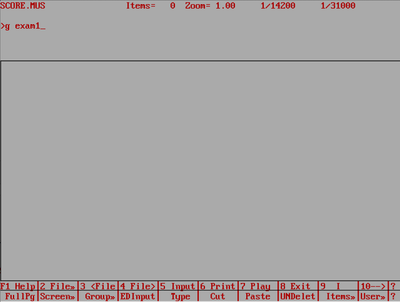
You can load your music back into the editor with the "G" command (G = get). The default extension is .mus, so you do not have to type that part if you do not want to: | You can load your music back into the editor with the "G" command (G = get). The default extension is .mus, so you do not have to type that part if you do not want to: | ||
</td><td> | |||
[[File:score-input-getfile.png|400px|thumb|center|Get the contents of a binary file.]] | [[File:score-input-getfile.png|400px|thumb|center|Get the contents of a binary file.]] | ||
</td></tr> | |||
<tr><td> | |||
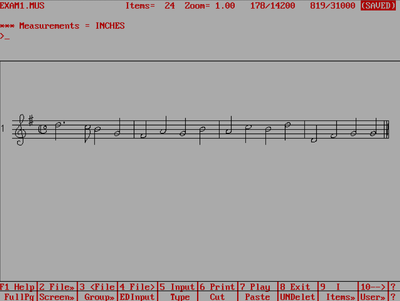
After getting the file, you should see your music back in the editor: | After getting the file, you should see your music back in the editor: | ||
</td><td> | |||
[[File:score-input-reload.png|400px|thumb|center|Reloaded music content.]] | [[File:score-input-reload.png|400px|thumb|center|Reloaded music content.]] | ||
</td></tr> | |||
<tr><td> | |||
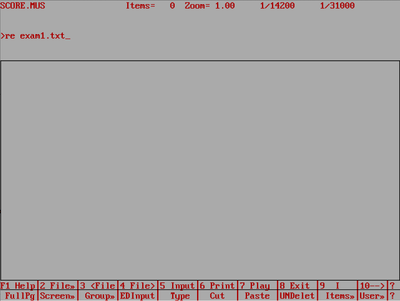
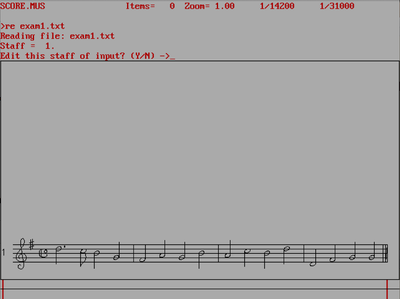
Alternatively, you can load the TEXT version that you created at the input mode stage. This is a form of SCORE macro which must be read with the RE command. Note the file extension is needed in this case since there is not default extension for macro files: | Alternatively, you can load the TEXT version that you created at the input mode stage. This is a form of SCORE macro which must be read with the RE command. Note the file extension is needed in this case since there is not default extension for macro files: | ||
</td><td> | |||
[[File:score-input-macrore.png|400px|thumb|center|Reloaded music content from text file macro.]] | [[File:score-input-macrore.png|400px|thumb|center|Reloaded music content from text file macro.]] | ||
</td></tr> | |||
<tr><td> | |||
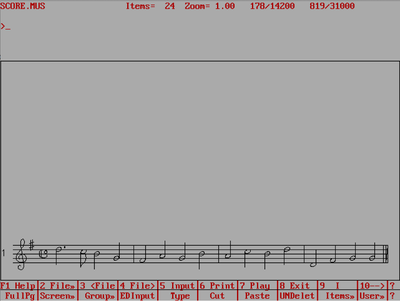
The read file will look the same as the binary exam1.mus file that was just loaded (because you have not done any further editing of the data after it was input). You can say {{keypress|Y}} to go back to input mode to alter the music, or press no to go back to command mode. | The read file will look the same as the binary exam1.mus file that was just loaded (because you have not done any further editing of the data after it was input). You can say {{keypress|Y}} to go back to input mode to alter the music, or press no to go back to command mode. | ||
</td><td> | |||
[[File:score-input-reloadedtext.png|400px|thumb|center|Reloaded music content from text file macro.]] | [[File:score-input-reloadedtext.png|400px|thumb|center|Reloaded music content from text file macro.]] | ||
</td></tr> | |||
<tr><td> | |||
Here is what the contents of the editor look like if typing N: | Here is what the contents of the editor look like if typing N: | ||
</td><td> | |||
[[File:score-input-backtocommand.png|400px|thumb|center|Back in command mode after reading text file with music.]] | |||
</td></tr> | |||
</table> | |||
== Lineup and Justify == | == Lineup and Justify == | ||
<table> | |||
<tr><td> | |||
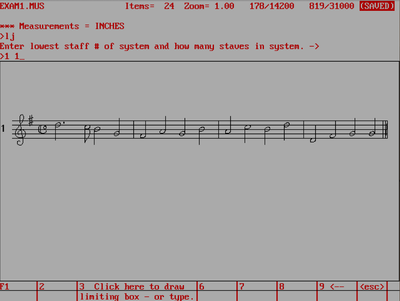
One of the more important commands is the <b>LJ</b> (Lineup and Justify) command. When you enter music in input mode, the music is spaced linearly: quarter notes take up half the space of half notes, half notes take up half the spaces of whole notes, etc. Music spacing does not display music in this 2:1 ratio. In SCORE the spacing between rhythmic levels is about 1.51:1, such as a whole note takes up 1.51 of the amount of space that two half notes take up instead of 2. To apply this geometric spacing to the music, type <b>LJ</b>, and then type two numbers (the bottom staff and how many staves to align while justifying). In this case "<b>1 1</b>" for a single staff. | |||
</td><td> | |||
[[File:score-lj-command.png|400px|thumb|center|LJ command in progress.]] | [[File:score-lj-command.png|400px|thumb|center|LJ command in progress.]] | ||
</td></tr> | |||
<tr><td> | |||
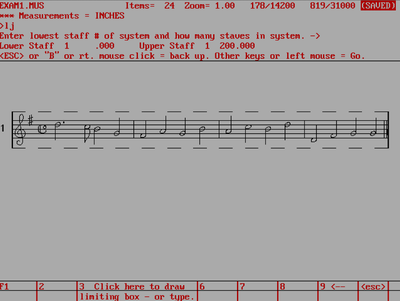
Notice that SCORE will box the music that is going to be aligned and justified. Press {{keypress|esc}} or {{keypress|B}} to cancel, or any other key to finish the LJ command. | Notice that SCORE will box the music that is going to be aligned and justified. Press {{keypress|esc}} or {{keypress|B}} to cancel, or any other key to finish the LJ command. | ||
</td><td> | |||
[[File:score-lj2-command.png|400px|thumb|center|LJ command in progress.]] | [[File:score-lj2-command.png|400px|thumb|center|LJ command in progress.]] | ||
</td></tr> | |||
<tr><td> | |||
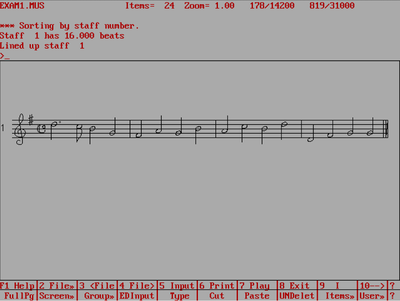
After the LJ command runs, the spacing of the music looks better (but not much difference for this example since the notes are almost all quarter notes): | After the LJ command runs, the spacing of the music looks better (but not much difference for this example since the notes are almost all quarter notes): | ||
</td><td> | |||
[[File:score-lj3-command.png|400px|thumb|center|LJ command finished.]] | [[File:score-lj3-command.png|400px|thumb|center|LJ command finished.]] | ||
</td></tr> | |||
</table> | |||
== Printing == | == Printing == | ||
<table> | |||
<tr><td> | |||
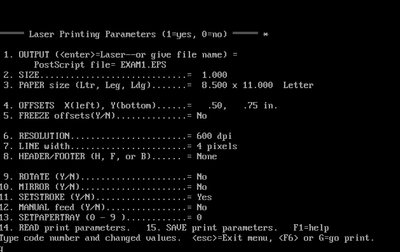
Press {{keypress|F6}} or type <b>PRINT</b> on the command line to go to the print menu: | |||
</td><td> | |||
[[File:score-printmenu.png|400px|thumb|center|PRINT menu.]] | [[File:score-printmenu.png|400px|thumb|center|PRINT menu.]] | ||
</td></tr> | |||
Type " | <tr><td> | ||
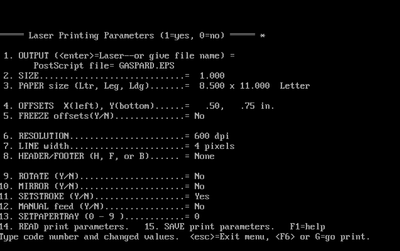
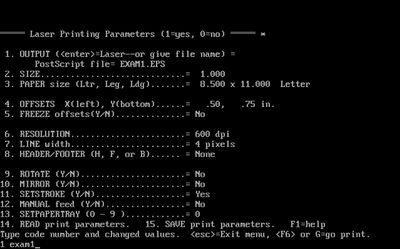
Type "<b>1 exam1</b> {{keypress|enter}}" to change the output from the laser printer (probably not connected to computer) to a file instead. The default extension is .eps (for Encapsulated PostScript): | |||
</td><td> | |||
[[File:score-filenameprint.png|400px|thumb|center|PRINT menu, changing filename to save to.]] | [[File:score-filenameprint.png|400px|thumb|center|PRINT menu, changing filename to save to.]] | ||
</td></tr> | |||
Then type "G" or press {{keypress|F6}} to start printing the page of music to the file exam1.eps: | <tr><td> | ||
Then type "<b>G</b>" or press {{keypress|F6}} to start printing the page of music to the file exam1.eps: | |||
</td><td> | |||
[[File:score-printg.png|400px|thumb|center|Start printing the music to a file.]] | |||
</td></tr> | |||
</table> | |||
After the music is printed, you will be taken back to the command mode. You can also try changing the margins (menu item 4), the scaling (menu item 2), Mirroring the music of | After the music is printed, you will be taken back to the command mode. You can also try changing the margins (menu item 4), the scaling (menu item 2), Mirroring the music of photo-offset reproduction (menu item 10). etc. Type "4 .5 6" to change the left margin to 0.5 inches and the bottom margin to 6 inches. | ||
The generated EPS file can be loaded directly into | The generated EPS file can be loaded directly into Microsoft Word for example. To generate a PDF file from the EPS file, you can do this with GhostScript in linux, OS X terminal or Windows (if Ghostscript is installed on your computer) | ||
ps2pdf -sPAPERSIZE=letter file.eps file.pdf | ps2pdf -sPAPERSIZE=letter file.eps file.pdf | ||
To install ps2pdf on MacOS try typing "brew install ghostscript" if you have [https://brew.sh Homebrew] installed on your computer. The default paper format for ps2pdf is A4, so "-sPAPERSIZE=letter" changes the margins to US letter size (8.5"x11") which is the default output size for SCORE. | |||
Here is an example of the EPS file opened in MacOS with Preview.app (Preview.app no longer displays EPS files, so you have to convert to PDF first): | |||
[[File:score-previewapp.png|600px|thumb|center|Final EPS output.]] | |||
And here is an SVG graphic made from the EPS file displayed directly on the webpage: | |||
<html> | |||
<?xml version="1.0"?> | |||
<!DOCTYPE svg PUBLIC "-//W3C//DTD SVG 1.1//EN" | |||
"http://www.w3.org/Graphics/SVG/1.1/DTD/svg11.dtd"> | |||
<svg version="1.1" | |||
xmlns="http://www.w3.org/2000/svg" | |||
xmlns:xlink="http://www.w3.org/1999/xlink" | |||
viewBox="37 0 542 45" | |||
width="700" height="55"> | |||
<g transform="translate(0,75) scale(1,-1) scale(.01800) translate(2100,26250)" stroke-linejoin="round" color="black" stroke="currentColor" fill="none" stroke-width="26.7067" fill-rule="evenodd"> | |||
<defs> | |||
<g id="P00"> | |||
<path d=" | |||
M118 -168 | |||
L162 -168 | |||
L200 -162 | |||
L256 -143 | |||
L306 -118 | |||
L350 -87 | |||
L368 -68 | |||
L400 -31 | |||
L418 6 | |||
L425 43 | |||
L425 68 | |||
L418 93 | |||
L412 106 | |||
L393 131 | |||
L368 150 | |||
L356 156 | |||
L337 162 | |||
L306 168 | |||
L262 168 | |||
L225 162 | |||
L187 150 | |||
L168 143 | |||
L118 118 | |||
L75 87 | |||
L56 68 | |||
L25 31 | |||
L6 -6 | |||
L0 -43 | |||
L0 -68 | |||
L6 -93 | |||
L12 -106 | |||
L31 -131 | |||
L56 -150 | |||
L68 -156 | |||
L87 -162 | |||
L118 -168 | |||
Z" fill="currentColor"/> | |||
</g> | |||
</defs> | |||
<path style="shape-rendering:crispEdges; stroke:#888888; stroke-width:35;" d=" | |||
M0 -24000 | |||
L30000 -24000 | |||
M0 -23650 | |||
L30000 -23650 | |||
M0 -23300 | |||
L30000 -23300 | |||
M0 -22955 | |||
L30000 -22955 | |||
M0 -22605 | |||
L30000 -22605 | |||
"/> | |||
<path d=" | |||
M631 -22925 | |||
L850 -24175 | |||
L862 -24293 | |||
L856 -24356 | |||
L843 -24393 | |||
L831 -24418 | |||
L806 -24456 | |||
L768 -24493 | |||
L737 -24512 | |||
L693 -24525 | |||
L656 -24531 | |||
L625 -24531 | |||
L562 -24525 | |||
L531 -24518 | |||
L506 -24506 | |||
L512 -24468 | |||
L537 -24475 | |||
L550 -24475 | |||
L575 -24468 | |||
L600 -24456 | |||
L618 -24443 | |||
L637 -24425 | |||
L656 -24393 | |||
L662 -24375 | |||
L668 -24343 | |||
L668 -24331 | |||
L662 -24300 | |||
L643 -24262 | |||
L631 -24250 | |||
L606 -24231 | |||
L593 -24225 | |||
L556 -24212 | |||
L525 -24212 | |||
L493 -24218 | |||
L462 -24231 | |||
L443 -24243 | |||
L425 -24262 | |||
L406 -24293 | |||
L400 -24312 | |||
L393 -24343 | |||
L393 -24368 | |||
L400 -24406 | |||
L412 -24437 | |||
L431 -24468 | |||
L462 -24500 | |||
L487 -24518 | |||
L531 -24537 | |||
L562 -24543 | |||
L625 -24550 | |||
L643 -24550 | |||
L693 -24543 | |||
L725 -24537 | |||
L756 -24525 | |||
L787 -24506 | |||
L831 -24462 | |||
L856 -24425 | |||
L875 -24368 | |||
L881 -24343 | |||
L887 -24287 | |||
L875 -24175 | |||
L656 -22925 | |||
L631 -22925 | |||
Z" fill="currentColor"/> | |||
<path d=" | |||
M587 -23975 | |||
L668 -23981 | |||
L718 -23981 | |||
L787 -23975 | |||
L825 -23968 | |||
L862 -23956 | |||
L912 -23931 | |||
"/> | |||
<path d=" | |||
M912 -23931 | |||
L956 -23887 | |||
L968 -23868 | |||
L987 -23837 | |||
L1000 -23806 | |||
L1006 -23787 | |||
L1012 -23762 | |||
L1018 -23718 | |||
L1018 -23687 | |||
L1012 -23650 | |||
L1006 -23625 | |||
L993 -23593 | |||
L968 -23556 | |||
L950 -23537 | |||
L925 -23518 | |||
L893 -23500 | |||
L862 -23487 | |||
L837 -23481 | |||
L781 -23475 | |||
L775 -23475 | |||
L718 -23481 | |||
L668 -23493 | |||
L643 -23506 | |||
L606 -23531 | |||
L581 -23562 | |||
L568 -23587 | |||
L556 -23618 | |||
L550 -23668 | |||
L556 -23712 | |||
L568 -23743 | |||
L587 -23775 | |||
L612 -23800 | |||
L668 -23837 | |||
L662 -23843 | |||
L600 -23812 | |||
L575 -23793 | |||
L543 -23762 | |||
L512 -23718 | |||
L493 -23668 | |||
L487 -23625 | |||
L487 -23593 | |||
L493 -23556 | |||
L500 -23531 | |||
L518 -23487 | |||
L537 -23456 | |||
L556 -23431 | |||
L587 -23400 | |||
L625 -23368 | |||
L656 -23350 | |||
L681 -23337 | |||
L737 -23325 | |||
L762 -23325 | |||
L825 -23331 | |||
L868 -23343 | |||
L912 -23362 | |||
L956 -23387 | |||
L1000 -23431 | |||
L1031 -23475 | |||
L1056 -23525 | |||
L1068 -23568 | |||
L1075 -23606 | |||
L1075 -23643 | |||
L1068 -23693 | |||
L1062 -23725 | |||
L1050 -23768 | |||
L1031 -23806 | |||
L1012 -23837 | |||
L987 -23868 | |||
L956 -23900 | |||
L912 -23931 | |||
Z" fill="currentColor"/> | |||
<path d=" | |||
M587 -23975 | |||
L550 -23968 | |||
L500 -23956 | |||
L462 -23943 | |||
L412 -23918 | |||
L387 -23900 | |||
L350 -23868 | |||
L318 -23837 | |||
L287 -23793 | |||
L262 -23743 | |||
L243 -23693 | |||
L231 -23637 | |||
L225 -23581 | |||
L225 -23518 | |||
L237 -23425 | |||
L256 -23350 | |||
L281 -23287 | |||
L312 -23225 | |||
L356 -23168 | |||
L412 -23106 | |||
L518 -23006 | |||
L587 -22943 | |||
L743 -22793 | |||
L812 -22712 | |||
L850 -22650 | |||
L875 -22593 | |||
L887 -22556 | |||
L900 -22506 | |||
L906 -22450 | |||
L906 -22412 | |||
L900 -22368 | |||
L893 -22350 | |||
L931 -22325 | |||
L943 -22375 | |||
L950 -22412 | |||
L956 -22468 | |||
L956 -22481 | |||
L950 -22568 | |||
L943 -22606 | |||
L931 -22662 | |||
L912 -22731 | |||
L887 -22793 | |||
L856 -22856 | |||
L812 -22931 | |||
L743 -23012 | |||
L512 -23231 | |||
L443 -23306 | |||
L406 -23356 | |||
L368 -23418 | |||
L356 -23443 | |||
L337 -23487 | |||
L325 -23531 | |||
L318 -23587 | |||
L318 -23631 | |||
L325 -23687 | |||
L337 -23737 | |||
L356 -23787 | |||
L387 -23843 | |||
L412 -23875 | |||
L443 -23906 | |||
L475 -23931 | |||
L512 -23950 | |||
L543 -23962 | |||
L587 -23975 | |||
Z" fill="currentColor"/> | |||
<path d=" | |||
M631 -22925 | |||
L606 -22750 | |||
L600 -22631 | |||
L600 -22537 | |||
L612 -22418 | |||
L625 -22362 | |||
L643 -22312 | |||
L668 -22268 | |||
L700 -22225 | |||
L731 -22187 | |||
L781 -22137 | |||
L806 -22125 | |||
L812 -22125 | |||
L825 -22131 | |||
L856 -22168 | |||
L893 -22237 | |||
L931 -22325 | |||
L893 -22350 | |||
L881 -22318 | |||
L862 -22293 | |||
L843 -22287 | |||
L837 -22287 | |||
L812 -22293 | |||
L806 -22300 | |||
L787 -22312 | |||
L762 -22337 | |||
L718 -22400 | |||
L681 -22475 | |||
L662 -22525 | |||
L643 -22612 | |||
L637 -22681 | |||
L637 -22725 | |||
L643 -22818 | |||
L656 -22925 | |||
L631 -22925 | |||
Z" fill="currentColor"/> | |||
<path d=" | |||
M1440 -22200 | |||
L1440 -23025 | |||
M1577 -22975 | |||
L1577 -22150 | |||
"/> | |||
<path d=" | |||
M1671 -22387 | |||
L1671 -22337 | |||
L1346 -22437 | |||
L1346 -22518 | |||
L1671 -22418 | |||
L1671 -22387 | |||
Z" fill="currentColor"/> | |||
<path d=" | |||
M1671 -22693 | |||
L1671 -22656 | |||
L1346 -22756 | |||
L1346 -22837 | |||
L1671 -22737 | |||
L1671 -22693 | |||
Z" fill="currentColor"/> | |||
<path d=" | |||
M2640 -23418 | |||
L2640 -23475 | |||
L2621 -23531 | |||
L2565 -23587 | |||
L2508 -23625 | |||
L2415 -23643 | |||
L2358 -23643 | |||
M2377 -22968 | |||
L2433 -22968 | |||
L2527 -22987 | |||
L2565 -23006 | |||
L2621 -23062 | |||
L2640 -23137 | |||
L2640 -23175 | |||
"/> | |||
<path d=" | |||
M2396 -23643 | |||
L2321 -23643 | |||
L2227 -23625 | |||
L2152 -23587 | |||
L2115 -23550 | |||
L2077 -23493 | |||
L2058 -23456 | |||
L2040 -23362 | |||
L2040 -23268 | |||
L2058 -23156 | |||
L2096 -23081 | |||
L2152 -23025 | |||
L2208 -22987 | |||
L2302 -22968 | |||
L2396 -22968 | |||
L2283 -22987 | |||
L2227 -23025 | |||
L2208 -23062 | |||
L2190 -23137 | |||
L2190 -23475 | |||
L2208 -23550 | |||
L2227 -23587 | |||
L2283 -23625 | |||
L2396 -23643 | |||
Z" fill="currentColor"/> | |||
<path d=" | |||
M2640 -23193 | |||
L2621 -23231 | |||
L2602 -23250 | |||
L2565 -23268 | |||
L2508 -23268 | |||
L2471 -23250 | |||
L2452 -23231 | |||
L2433 -23193 | |||
L2433 -23137 | |||
L2452 -23100 | |||
L2471 -23081 | |||
L2508 -23062 | |||
L2565 -23062 | |||
L2602 -23081 | |||
L2621 -23100 | |||
L2640 -23137 | |||
L2640 -23193 | |||
Z" fill="currentColor"/> | |||
<use transform="translate(3146,-22950)" xlink:href="#P00"/> | |||
<path d=" | |||
M3146 -23002 | |||
L3146 -24175 | |||
"/> | |||
<path d=" | |||
M3796 -22787 | |||
L3796 -22756 | |||
L3821 -22731 | |||
L3852 -22731 | |||
L3877 -22756 | |||
L3877 -22787 | |||
L3852 -22812 | |||
L3821 -22812 | |||
L3796 -22787 | |||
L3796 -22756 | |||
Z" fill="currentColor"/> | |||
<use transform="translate(5154,-23125)" xlink:href="#P00"/> | |||
<path d=" | |||
M5154 -23177 | |||
L5154 -24350 | |||
"/> | |||
<path stroke-width="20.0300" d=" | |||
M5523 -23400 | |||
L5529 -23437 | |||
L5535 -23525 | |||
L5535 -23556 | |||
L5529 -23625 | |||
L5523 -23662 | |||
L5504 -23725 | |||
L5485 -23768 | |||
L5466 -23806 | |||
L5441 -23843 | |||
L5410 -23881 | |||
L5379 -23912 | |||
L5341 -23943 | |||
L5285 -23981 | |||
L5223 -24012 | |||
L5154 -24037 | |||
L5154 -24375 | |||
L5173 -24300 | |||
L5179 -24281 | |||
L5191 -24250 | |||
L5216 -24200 | |||
L5235 -24168 | |||
L5254 -24143 | |||
L5285 -24106 | |||
L5354 -24031 | |||
L5379 -24006 | |||
L5423 -23956 | |||
L5448 -23925 | |||
L5473 -23887 | |||
L5498 -23843 | |||
L5516 -23800 | |||
L5529 -23762 | |||
L5541 -23712 | |||
L5548 -23675 | |||
L5554 -23600 | |||
L5554 -23531 | |||
L5548 -23462 | |||
L5541 -23418 | |||
L5535 -23387 | |||
L5529 -23362 | |||
L5523 -23400 | |||
Z" fill="currentColor"/> | |||
<path stroke-width="20.0300" d=" | |||
M5541 -23418 | |||
L5535 -23387 | |||
L5529 -23362 | |||
L5516 -23318 | |||
L5491 -23250 | |||
L5504 -23293 | |||
L5510 -23325 | |||
L5516 -23356 | |||
L5523 -23400 | |||
L5529 -23437 | |||
L5541 -23418 | |||
Z" fill="currentColor"/> | |||
<use transform="translate(6219,-23300)" xlink:href="#P00"/> | |||
<path d=" | |||
M6219 -23352 | |||
L6219 -24525 | |||
"/> | |||
<use transform="translate(7800,-23650)" xlink:href="#P00"/> | |||
<path d=" | |||
M8225 -23597 | |||
L8225 -22425 | |||
"/> | |||
<path d=" | |||
M9400 -24000 | |||
L9400 -22600 | |||
M9407 -24000 | |||
L9407 -22600 | |||
"/> | |||
<use transform="translate(9918,-23825)" xlink:href="#P00"/> | |||
<path d=" | |||
M10343 -23772 | |||
L10343 -22600 | |||
"/> | |||
<use transform="translate(11499,-23475)" xlink:href="#P00"/> | |||
<path d=" | |||
M11924 -23422 | |||
L11924 -22250 | |||
"/> | |||
<use transform="translate(13080,-23650)" xlink:href="#P00"/> | |||
<path d=" | |||
M13505 -23597 | |||
L13505 -22425 | |||
"/> | |||
<use transform="translate(14672,-23300)" xlink:href="#P00"/> | |||
<path d=" | |||
M14672 -23352 | |||
L14672 -24525 | |||
"/> | |||
<path d=" | |||
M16261 -24000 | |||
L16261 -22600 | |||
M16268 -24000 | |||
L16268 -22600 | |||
"/> | |||
<use transform="translate(16778,-23475)" xlink:href="#P00"/> | |||
<path d=" | |||
M17203 -23422 | |||
L17203 -22250 | |||
"/> | |||
<use transform="translate(18371,-23125)" xlink:href="#P00"/> | |||
<path d=" | |||
M18371 -23177 | |||
L18371 -24350 | |||
"/> | |||
<use transform="translate(19952,-23300)" xlink:href="#P00"/> | |||
<path d=" | |||
M19952 -23352 | |||
L19952 -24525 | |||
"/> | |||
<use transform="translate(21533,-22950)" xlink:href="#P00"/> | |||
<path d=" | |||
M21533 -23002 | |||
L21533 -24175 | |||
"/> | |||
<path d=" | |||
M23122 -24000 | |||
L23122 -22600 | |||
M23128 -24000 | |||
L23128 -22600 | |||
"/> | |||
<use transform="translate(23639,-24175)" xlink:href="#P00"/> | |||
<path d=" | |||
M24064 -24122 | |||
L24064 -22950 | |||
"/> | |||
<use transform="translate(25220,-23825)" xlink:href="#P00"/> | |||
<path d=" | |||
M25645 -23772 | |||
L25645 -22600 | |||
"/> | |||
<use transform="translate(26801,-23650)" xlink:href="#P00"/> | |||
<path d=" | |||
M27226 -23597 | |||
L27226 -22425 | |||
"/> | |||
<use transform="translate(28383,-23650)" xlink:href="#P00"/> | |||
<path d=" | |||
M28808 -23597 | |||
L28808 -22425 | |||
"/> | |||
<path d=" | |||
M29655 -24000 | |||
L29655 -22600 | |||
M29661 -24000 | |||
L29661 -22600 | |||
M29850 -24000 | |||
L30000 -22600 | |||
"/> | |||
<path d=" | |||
M30000 -22600 | |||
L30000 -24000 | |||
L29850 -24000 | |||
L29850 -22600 | |||
L30000 -22600 | |||
Z" fill="currentColor"/> | |||
</g> | |||
</svg> | |||
<?SCORE version="4" | |||
#SVG_SCALE: 3 | |||
8. 1.0 .000 .00 .00 200.00 | |||
3. 1.0 1.500 | |||
17. 1.0 9.475 .00 1.00 | |||
18. 1.0 13.475 .00 99.00 1.00 | |||
1. 1.0 20.975 9.00 20.00 .00 1.5000 .00 10.00 | |||
1. 1.0 34.362 8.00 20.00 .00 .5000 .00 1.00 | |||
1. 1.0 41.464 7.00 20.00 .00 1.0000 | |||
1. 1.0 52.005 5.00 10.00 .00 1.0000 | |||
14. 1.0 62.670 1.00 | |||
1. 1.0 66.121 4.00 10.00 .00 1.0000 | |||
1. 1.0 76.662 6.00 10.00 .00 1.0000 | |||
1. 1.0 87.203 5.00 10.00 .00 1.0000 | |||
1. 1.0 97.818 7.00 20.00 .00 1.0000 | |||
14. 1.0 108.409 1.00 | |||
1. 1.0 111.859 6.00 10.00 .00 1.0000 | |||
1. 1.0 122.475 8.00 20.00 .00 1.0000 | |||
1. 1.0 133.016 7.00 20.00 .00 1.0000 | |||
1. 1.0 143.557 9.00 20.00 .00 1.0000 | |||
14. 1.0 154.147 1.00 | |||
1. 1.0 157.598 2.00 10.00 .00 1.0000 | |||
1. 1.0 168.138 4.00 10.00 .00 1.0000 | |||
1. 1.0 178.679 5.00 10.00 .00 1.0000 | |||
1. 1.0 189.220 5.00 10.00 .00 1.0000 | |||
14. 1.0 200.000 1.00 2.00 | |||
?> | |||
</html> | |||
This SVG image was created by running the EPS output from SCORE through [https://github.com/craigsapp/seps2svg seps2svg], written by Thomas Weber. | |||
== MIDI playback == | == MIDI playback == | ||
<table> | |||
<tr><td> | |||
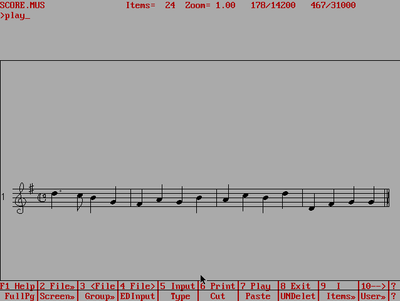
The music can be played back by typing <b>PLAY</b> in command mode. | |||
</td><td> | |||
[[File:score-play.png|400px|thumb|center|Start play mode.]] | [[File:score-play.png|400px|thumb|center|Start play mode.]] | ||
</td></tr> | |||
<tr><td> | |||
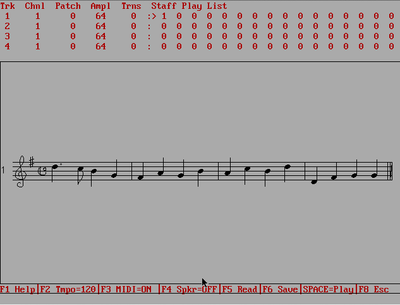
At the top of the play screen, a list of numbers will be shown. For simple cases these values aren't interesting, but for multi-staff systems and multiple systems on a page, this list is used to specify which staves should played together if the program doesn't figure it out correctly. Press the {{keypress|space}} bar to listen to the music. | |||
</td><td> | |||
[[File:score-play2.png|400px|thumb|center|In play mode.]] | |||
</td></tr> | |||
</table> | |||
== Boxerapp tips (MacOS emulator for MS-DOS) == | |||
[http://boxerapp.com Boxer.app] is an MS-DOS emulator for OS X. Here are some tips related to using SCORE in boxer.app: | |||
<ul> | |||
<li> | |||
Type {{keypress|Fn|M}} to toggle the insert/overwrite key, since Apples do not have such a key thanks to [https://en.wikipedia.org/wiki/Jef_Raskin Jeff Raskin] (note that this no longer seems to work). | |||
</li> | |||
<li> | |||
To get the mouse out of Boxer, do {{keypress|Command|click}}. | |||
</li> | |||
<li> | |||
{{keypress|Command|F}} toggles full-screen view | |||
</li> | |||
</ul> | |||
The [http://boxerapp.com/guide/shortcuts list of shortcuts] for Boxer.app for more tips (also see the built-in help system for a list of the shortcuts, since these will be more up-to-date). | |||
== DosBox tips (Windows emulator for MS-DOS) == | |||
* Press alt-enter to go into full-screen mode. Press alt-enter again to exit full-screen mode. | |||
* Here are [https://defkey.com/dosbox-shortcuts other keyboard shortcuts] in DosBox. | |||
== Fixing mistakes in User Input Mode == | |||
If you make a mistake in a user input line, but you only notice it at a later stage in the input stages, you can cycle back to a previous stage by pressing {{keypress|esc}} key. Then press the {{keypress|N}} key to <b>not abandon</b> the input. The press {{keypress|enter}} key twice to get back to the pitch stage (the first two lines are the values from the initial Input mode menu). Press enter for each stage that is correct until you get to the one you need to fix. Then you can use the arrow keys to go back to the text that needs to be fixed. If you need to insert text in boxer.app in OS X, you need to switch from overwrite mode to insert mode with {{keypress|Fn|M}}. DosBox users in Windows can press the insert key to go into insert mode, so it should not be as confusing. | |||
Another thing to watch out for is that the maximum line lengths for any input stage is 256 characters. You can keep typing and have the line wrap about three times without hitting this limit. Any stage can be placed on multiple lines, and any stage which ends up being longer than 256 characters must be put on multiple lines. You can press enter at any point when inputting a line to go to the next line of the same input stage. Typically you would do this after inserting the item separator {{keypress|/}}. | |||
== Going back to User Input Mode to fix mistakes == | |||
If you notice a mistake after exiting from input mode, then type <b>EDI</b> in command mode. The editor will then ask which staff you want to edit; type the staff number shown to the left of the staff. This takes you back to input mode and correct the error. Note that the EDI command cannot be used if you have more than one layer/voice on the staff (or in the region of the staff that you are editing with EDI). Also note that any graphical edits on music music will be lost if you use EDI, so EDI is not typically used by SCORE experts who would instead fix the errors in command mode (But you don't know how to do that yet if you are reading this page...). | |||
== Edit mode warning == | |||
Be careful as a beginner on using the mouse to click on the graphical notation once you are back in command mode. This will cause you to go into edit mode for a particular item that you clicked on. If you did that by accident, you will have an urge to click somewhere else in the window to deselect the item; however, this will instead move the item to where you clicked. You will then have an urge to press {{keypress|esc}} to cancel the move; however {{keypress|esc}} will save the edit and take you back to command mode, locking in your accidental move. If you end up in edit mode for an item, and and you accidentally move the item, instead press {{keypress|F8}} to <b>abort</b> the change (or click on the ABORT button in the bottom menu in the editor). | |||
== Undo warning == | |||
SCORE does not have any real undo capability—so don't make any mistakes... | |||
There is an <b>UND</b> command in command mode. Running this command will undelete the last item that was deleted. This only undeletes the last item, and cannot be used for complex operations such as <b>LJ</b> which alters multiple items. In other words, SCORE beginners should learn to save their work often to avoid having to re-enter the music from scratch. After you do the first <b>SA</b> (see further above), you can type <b>SM</b> in command mode to save the current contents of the editor to the file you are currently working on. Do this before you make any major changes to your music. Then if you make a horrible mistake, you can type <b>RS</b> to clear the editor, and <b>G file</b>.mus to load the previous contents of the file which was saved before you messed it up. | |||
Latest revision as of 17:07, 12 February 2025
This page is a detailed step-by-step tutorial for inputing music in the SCORE editor (MS-DOS version). This guide is useful for the first-time user to learn how to do basic navigation in the SCORE editor. This tutorial is useful for practice entering the exercises on the SCORE user input page.
Inputting Music
Saving Music
Clearing Music
|
Try typing "RS ↵ Enter" to clear the contents of the editor: |
 |
|
This will put the editor in the initial state: |
 |
Load Music
Lineup and Justify
Printing
After the music is printed, you will be taken back to the command mode. You can also try changing the margins (menu item 4), the scaling (menu item 2), Mirroring the music of photo-offset reproduction (menu item 10). etc. Type "4 .5 6" to change the left margin to 0.5 inches and the bottom margin to 6 inches.
The generated EPS file can be loaded directly into Microsoft Word for example. To generate a PDF file from the EPS file, you can do this with GhostScript in linux, OS X terminal or Windows (if Ghostscript is installed on your computer)
ps2pdf -sPAPERSIZE=letter file.eps file.pdf
To install ps2pdf on MacOS try typing "brew install ghostscript" if you have Homebrew installed on your computer. The default paper format for ps2pdf is A4, so "-sPAPERSIZE=letter" changes the margins to US letter size (8.5"x11") which is the default output size for SCORE.
Here is an example of the EPS file opened in MacOS with Preview.app (Preview.app no longer displays EPS files, so you have to convert to PDF first):

And here is an SVG graphic made from the EPS file displayed directly on the webpage:
This SVG image was created by running the EPS output from SCORE through seps2svg, written by Thomas Weber.
MIDI playback
Boxerapp tips (MacOS emulator for MS-DOS)
Boxer.app is an MS-DOS emulator for OS X. Here are some tips related to using SCORE in boxer.app:
- Type Fn+M to toggle the insert/overwrite key, since Apples do not have such a key thanks to Jeff Raskin (note that this no longer seems to work).
- To get the mouse out of Boxer, do Command+click.
- Command+F toggles full-screen view
The list of shortcuts for Boxer.app for more tips (also see the built-in help system for a list of the shortcuts, since these will be more up-to-date).
DosBox tips (Windows emulator for MS-DOS)
- Press alt-enter to go into full-screen mode. Press alt-enter again to exit full-screen mode.
- Here are other keyboard shortcuts in DosBox.
Fixing mistakes in User Input Mode
If you make a mistake in a user input line, but you only notice it at a later stage in the input stages, you can cycle back to a previous stage by pressing esc key. Then press the N key to not abandon the input. The press ↵ Enter key twice to get back to the pitch stage (the first two lines are the values from the initial Input mode menu). Press enter for each stage that is correct until you get to the one you need to fix. Then you can use the arrow keys to go back to the text that needs to be fixed. If you need to insert text in boxer.app in OS X, you need to switch from overwrite mode to insert mode with Fn+M. DosBox users in Windows can press the insert key to go into insert mode, so it should not be as confusing.
Another thing to watch out for is that the maximum line lengths for any input stage is 256 characters. You can keep typing and have the line wrap about three times without hitting this limit. Any stage can be placed on multiple lines, and any stage which ends up being longer than 256 characters must be put on multiple lines. You can press enter at any point when inputting a line to go to the next line of the same input stage. Typically you would do this after inserting the item separator /.
Going back to User Input Mode to fix mistakes
If you notice a mistake after exiting from input mode, then type EDI in command mode. The editor will then ask which staff you want to edit; type the staff number shown to the left of the staff. This takes you back to input mode and correct the error. Note that the EDI command cannot be used if you have more than one layer/voice on the staff (or in the region of the staff that you are editing with EDI). Also note that any graphical edits on music music will be lost if you use EDI, so EDI is not typically used by SCORE experts who would instead fix the errors in command mode (But you don't know how to do that yet if you are reading this page...).
Edit mode warning
Be careful as a beginner on using the mouse to click on the graphical notation once you are back in command mode. This will cause you to go into edit mode for a particular item that you clicked on. If you did that by accident, you will have an urge to click somewhere else in the window to deselect the item; however, this will instead move the item to where you clicked. You will then have an urge to press esc to cancel the move; however esc will save the edit and take you back to command mode, locking in your accidental move. If you end up in edit mode for an item, and and you accidentally move the item, instead press F8 to abort the change (or click on the ABORT button in the bottom menu in the editor).
Undo warning
SCORE does not have any real undo capability—so don't make any mistakes...
There is an UND command in command mode. Running this command will undelete the last item that was deleted. This only undeletes the last item, and cannot be used for complex operations such as LJ which alters multiple items. In other words, SCORE beginners should learn to save their work often to avoid having to re-enter the music from scratch. After you do the first SA (see further above), you can type SM in command mode to save the current contents of the editor to the file you are currently working on. Do this before you make any major changes to your music. Then if you make a horrible mistake, you can type RS to clear the editor, and G file.mus to load the previous contents of the file which was saved before you messed it up.
