Installing SharpEye
Instructions for installing SharpEye:
SharpEye is for Windows only, so it should be easy to install on Windows. If you do not have windows, then you can install Wine.
Download
Download SharpEye version 2.68 from the webpage http://www.visiv.co.uk/dload.htm
There is a free unrestricted 30-day evaluation period.
Windows 10
To install in Windows 10, run the installsharpeye2.exe installer and follow the instructions.
The program will be installed in "C:\Program Files (x86)\visiv-co-uk\SharpEye2\sharpeye.exe"
MacOS
On MacOS, first install Wineskins according to the instructions in this video: https://www.youtube.com/watch?v=vkQj0lZFz6I
As explained in the video, the Wineskin software is on Github: https://github.com/Gcenx/WineskinServer
Note that the Github software installation recommends using Homebrew for installation. This is a linux-like package manager for MacOS that I would recommend (provided you do not already have a similar system installed such as MacPorts).
- Install Homebrew from https://brew.sh
- Run the command `brew install --cask --no-quarantine gcenx/wine/unofficial-wineskin`
- This will install the app in `/Applications/Wineskin Winery.app`, open it up.
- The following window will appear:
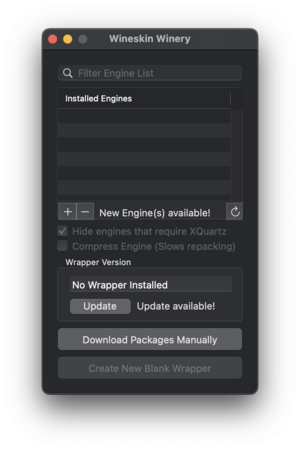
- Click on the "Update" button to install a Wrapper, the following window appears:
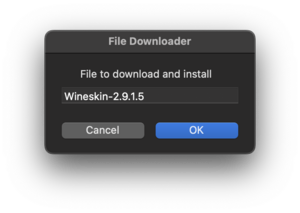
- After installing the updated wrapper, the original window will look like this:
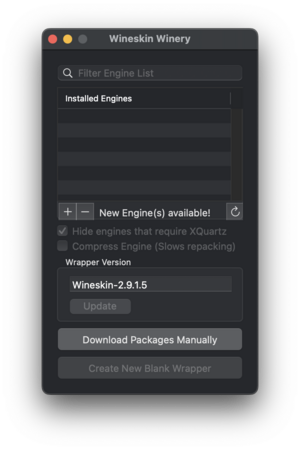
- Then click on the "+" button to add a new Engine. This window will appear:
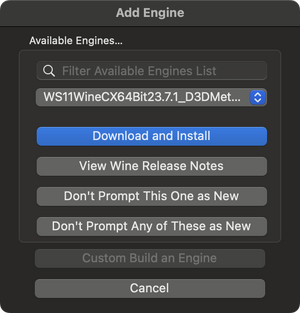
- Choose the most recent 64-bit version, which is probably the default. In this case "WS11WineCX64Bit22.0.1-1". Then click on the "Download and Install" button to install the engine.
- You are then returned to the original window, but there will now be an engine installed:
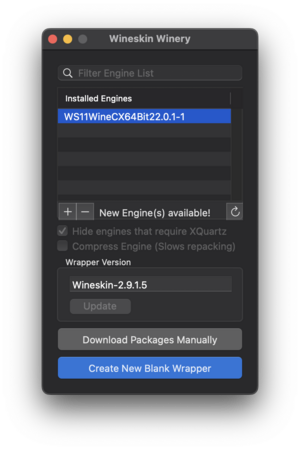
- Now click on the "Create New Blank Wrapper" button near the bottom of the initial window.
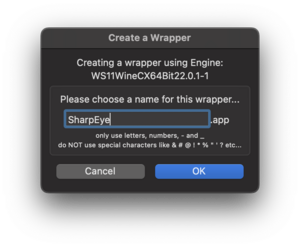
- And give the name to the App: SharpEye. Press "OK" and wait a while (about a minute) for the installation to finish.
- There will be a window that appears:

I installed with the manual method last year (probably before it was available in Homebrew). For this method, click on the green "Code" button on that page and then download as zip. You have to double click to unzip the software. Then open the folder "WineskinServer-master/Winery" and then double click on WineskinWinder.app.tar.7z to uncompress the app. The open the app. You will need to give permission to run the program through the Apple Preferences -> Security -> General window (twice in MacOS 10.15). And later there will probably be a popup window to allow Wineskins to allow access to your hard disk.
After you install SharpEye, it will be found at "C:\Program Files (x86)\visiv-co-uk\SharpEye2\sharpeye2.exe". I had to go to the WineskinServer Advanced tab to select that location for the executable (mentioned briefly in the installation video above).
I gave the Wineskin wrapper the name "SharpEye". After setting up according to the video, the SharpEye.app will be found in "~/Applications/Wineskin/SharpEye.app" ("~/" means your home directory).
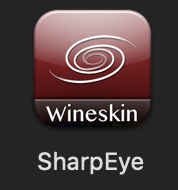
I also created a directory/folder called "~/SharpEye" to store SharpEye files in. This directory is called "C:\users\<your-user-name>\Sharpeye" in the SharpEye.app. I also dragged the SharpEye.app to my dock for easy access. I also created a symbolic link from ~/SharpEye to ~/Desktop/SharpEye with this Terminal.app command:
cd ~/Desktop; ln -s ~/SharpEye .
Then I can drag-and-drop the TIFF images into that directory on the desktop, and the open the folder to see the saved output from SharpEye.
Lab
Go (back) to the SharpEye Lab page.